
Polylang is an easy-to-use plugin that lets you translate a WordPress site easily.
In contrast to more complex solutions such as WPML, Polylang cuts to the chase and meets most needs.
![]() A Premium version offers more possibilities for managing urls and allows better integration with other plugins such as ACF Pro or TheEvents Calendar. (Download the extension for WordPress)
A Premium version offers more possibilities for managing urls and allows better integration with other plugins such as ACF Pro or TheEvents Calendar. (Download the extension for WordPress)
Parameterize Polylang
Start by adding your languages
In the language menu, make your selection, then click “add a new language”. Repeat for each language.
If necessary, change the favorite language that will be displayed by default, by clicking on the star picto.
You can change the flag associated with the language, but please note that you cannot add your own image via this page. If you want to customize the flags, you need to add them to the directory /wp-content/polylang. Read the full method on the official website.
Polylang settings
In its free version, Polylang gives you some useful options for controlling the display of your translations. Notably the form of urls as well as language detection of the browser.
Post synchronization
In addition, the settings allow you to manage the synchronization of posts in different languages. So, in the settings page, it’s possible to choose which items you’d like to synchronize. (By default none is active)

Synchronization improves consistency between different versions of the site and saves you time as changes made are carried over from one language to another.
For example, if you associate a category with an article in French, the corresponding English category will be associated with the corresponding English article.
Translate posts, pages, categories and media
Translating articles or any other type of post works on the same principle for pages, categories and media.
How to create a multilingual article
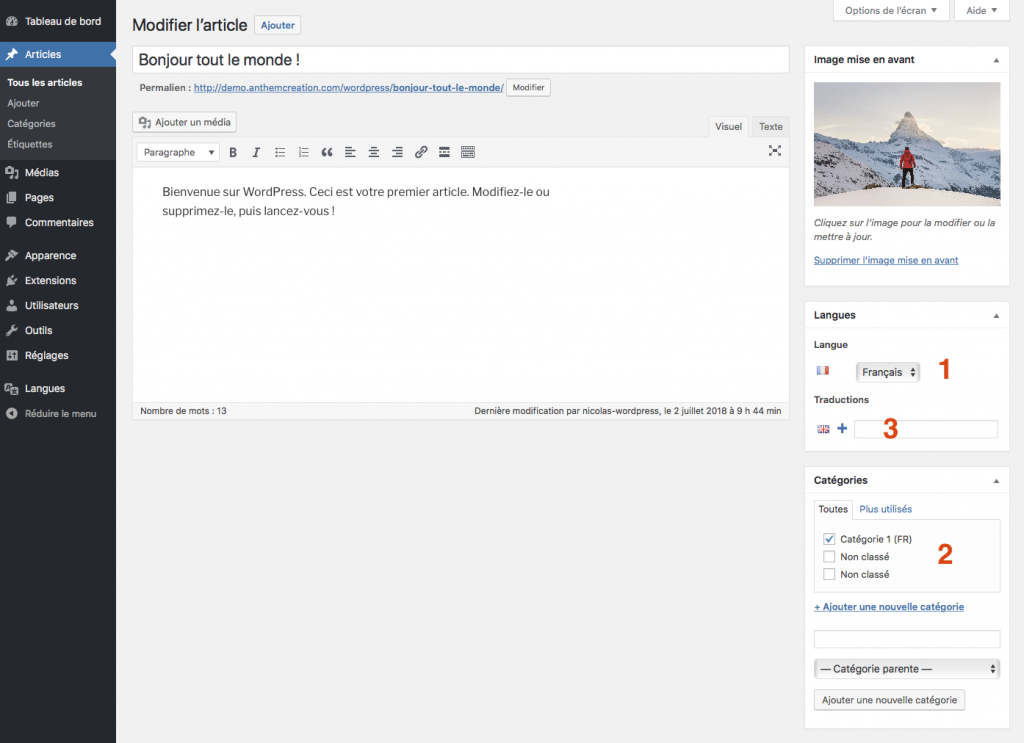
Once you’ve written the content, choose language (1), category (2), then save or publish your post.
Next, you can create a translation (3) by clicking on the “+” sign. You’ll then be directed to the creation of a new page that will be associated with it.
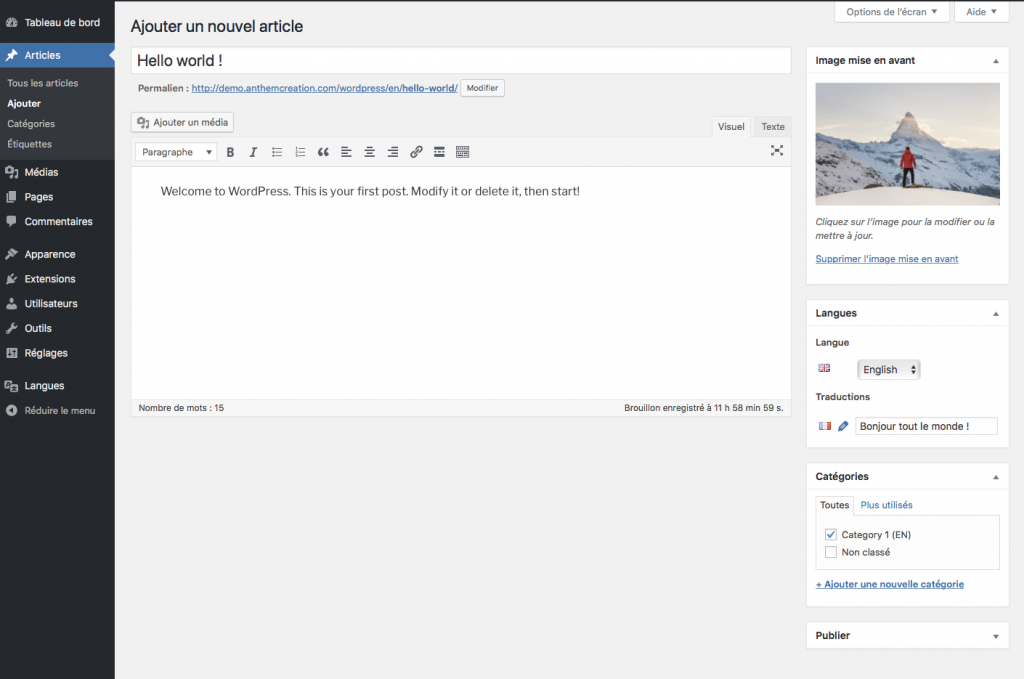
Also note that if taxonomy synchronization is enabled in settings and the category exists for the different languages, then the categories will automatically associate. (This is why I advise you if possible to create your categories in advance.)
Similarly, if the“front-page image” synchronization is enabled and you’ve translated the images into each language, the image will be present on the new page. As we’ll see later in the article, in case you haven’t translated your media, you can do so by modifying the image.
If synchronization is active, all you have to do is choose a title, create your content, and publish!
Other ways to add a translation
If you wish to modify or add a translation to existing content, you can do so via the post page (as explained above) or via the listing of posts.

You can see at a glance the status of translations and add new ones. As on editing a post, click on the “+” and create the new page.
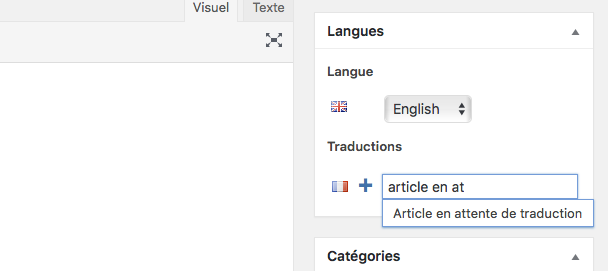
If you create a post or page by clicking directly on “create” or “add” in the WordPress menu, you will then need to associate pages manually via the “translations” dialog box. To do this, simply start typing the name of the page you wish to associate, and a suggestion will appear (if the page has already been created).
Translate categories and tags
To translate your article categories, your tags, or any other post taxonomies, the operation remains the same.
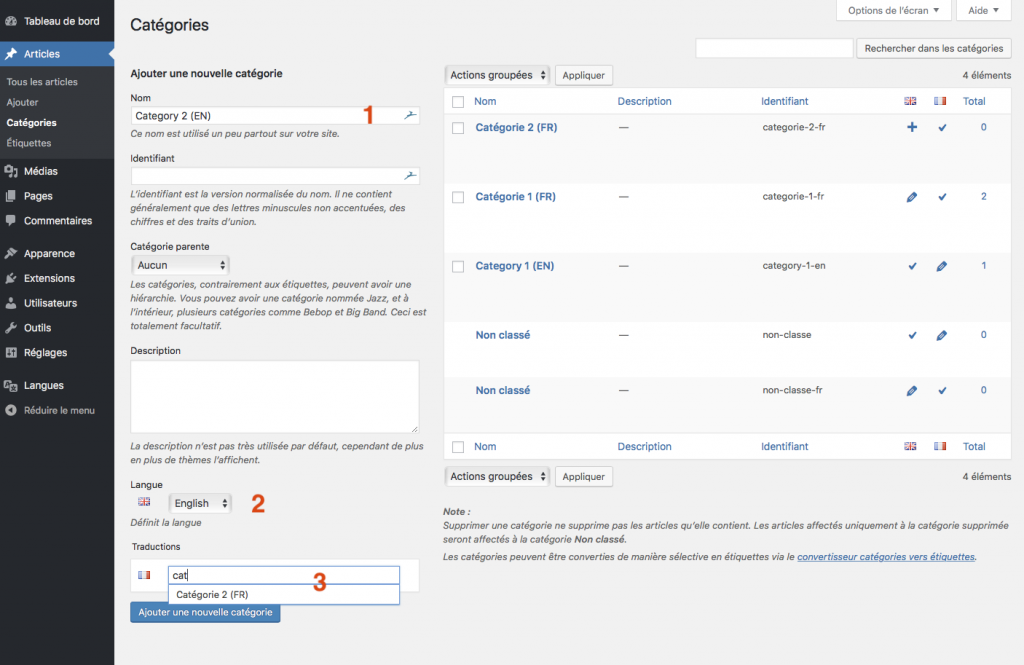
Create your own categories and link them to your existing translations.
- Choose name
- Select language
- Select translations (if already created)
As with posts, use the predictive selection of the “Translations” input field to select them.
Translate media for better SEO
Translating media is recommended to improve the SEO of your multilingual site. In fact, the meta data of your images is crucial for your SEO. (If you’re attentive to SEO, also read our SEO guide for the Yoast plugin)
In case you’ve activated media translation in the plugin settings, Polylang creates translations for these meta data but doesn’t duplicate the image. It is still possible to have different media for each language.
If this option is disabled, the media and their associated data are used whatever the language. Note that it is not advisable to activate this option if your media library already contains items.
Also beware, images associated with one language are not accessible to content in other languages. You will therefore need to all associate them correctly, otherwise you risk not seeing them appear in the media library when editing your content.
Modify your metadata
Let’s take the example of an image. In the media library, click on edit image.
Choose a title and fill in the associated meta data. Don’t forget to select the language before updating the information.
As usual, click on the + sign to create the translation.
How to display languages on your WordPress site
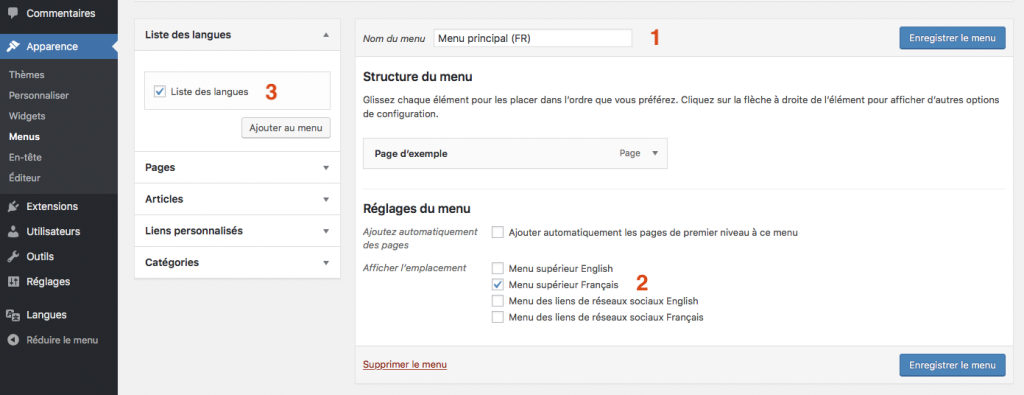
To display the choice of languages, you’ll need to add the “language switcher” to your menu. To do this go to the “Appearance” menu, then to the “Menus” page.
Each language should have its own menu.
- Start by creating or modifying the menu for your favorite language (FR in our example)
- Assign it to a language
- Add the list of languages (Tick then click add)
Don’t forget to save your menu.
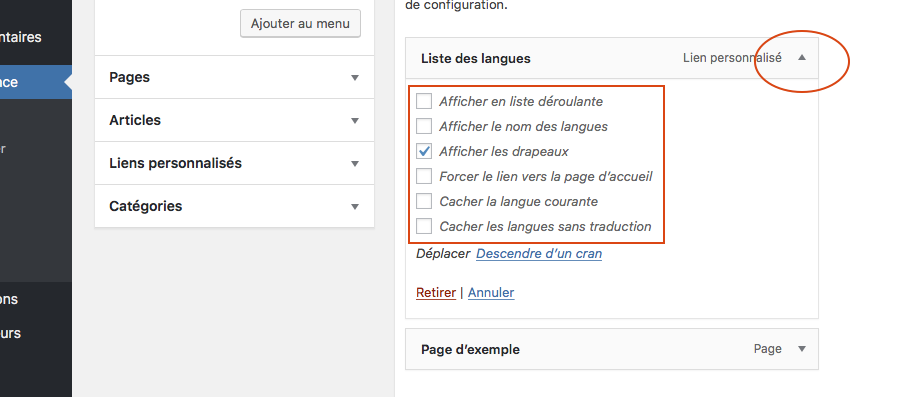
Click on the language list block to display the options. You can choose to display languages as text or pictograms.
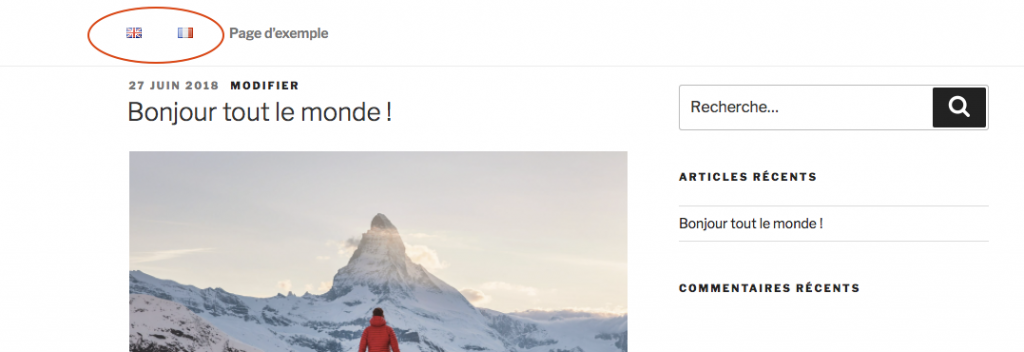
Here’s the default rendering on the site.
So much for the essential features of the Polylang plugin. As you can see, the principle is simple: there are no complicated features or options to create your multilingual WordPress site.
If you have any questions, don’t hesitate to ask in the comments.
Related Articles

5 essential WordPress functions for customizing your theme
Add additional image sizes in WordPress WordPress lets you add additional image sizes that you can use in your themes. You can do this using the add_image_size() function. This function…

WordPress administration: A quick introduction to the interface
Want to quickly get to grips with WordPress to publish articles and edit your site? Take a few minutes to discover the Administration interface of WordPress. Discover the main editing…
